by: Lauren

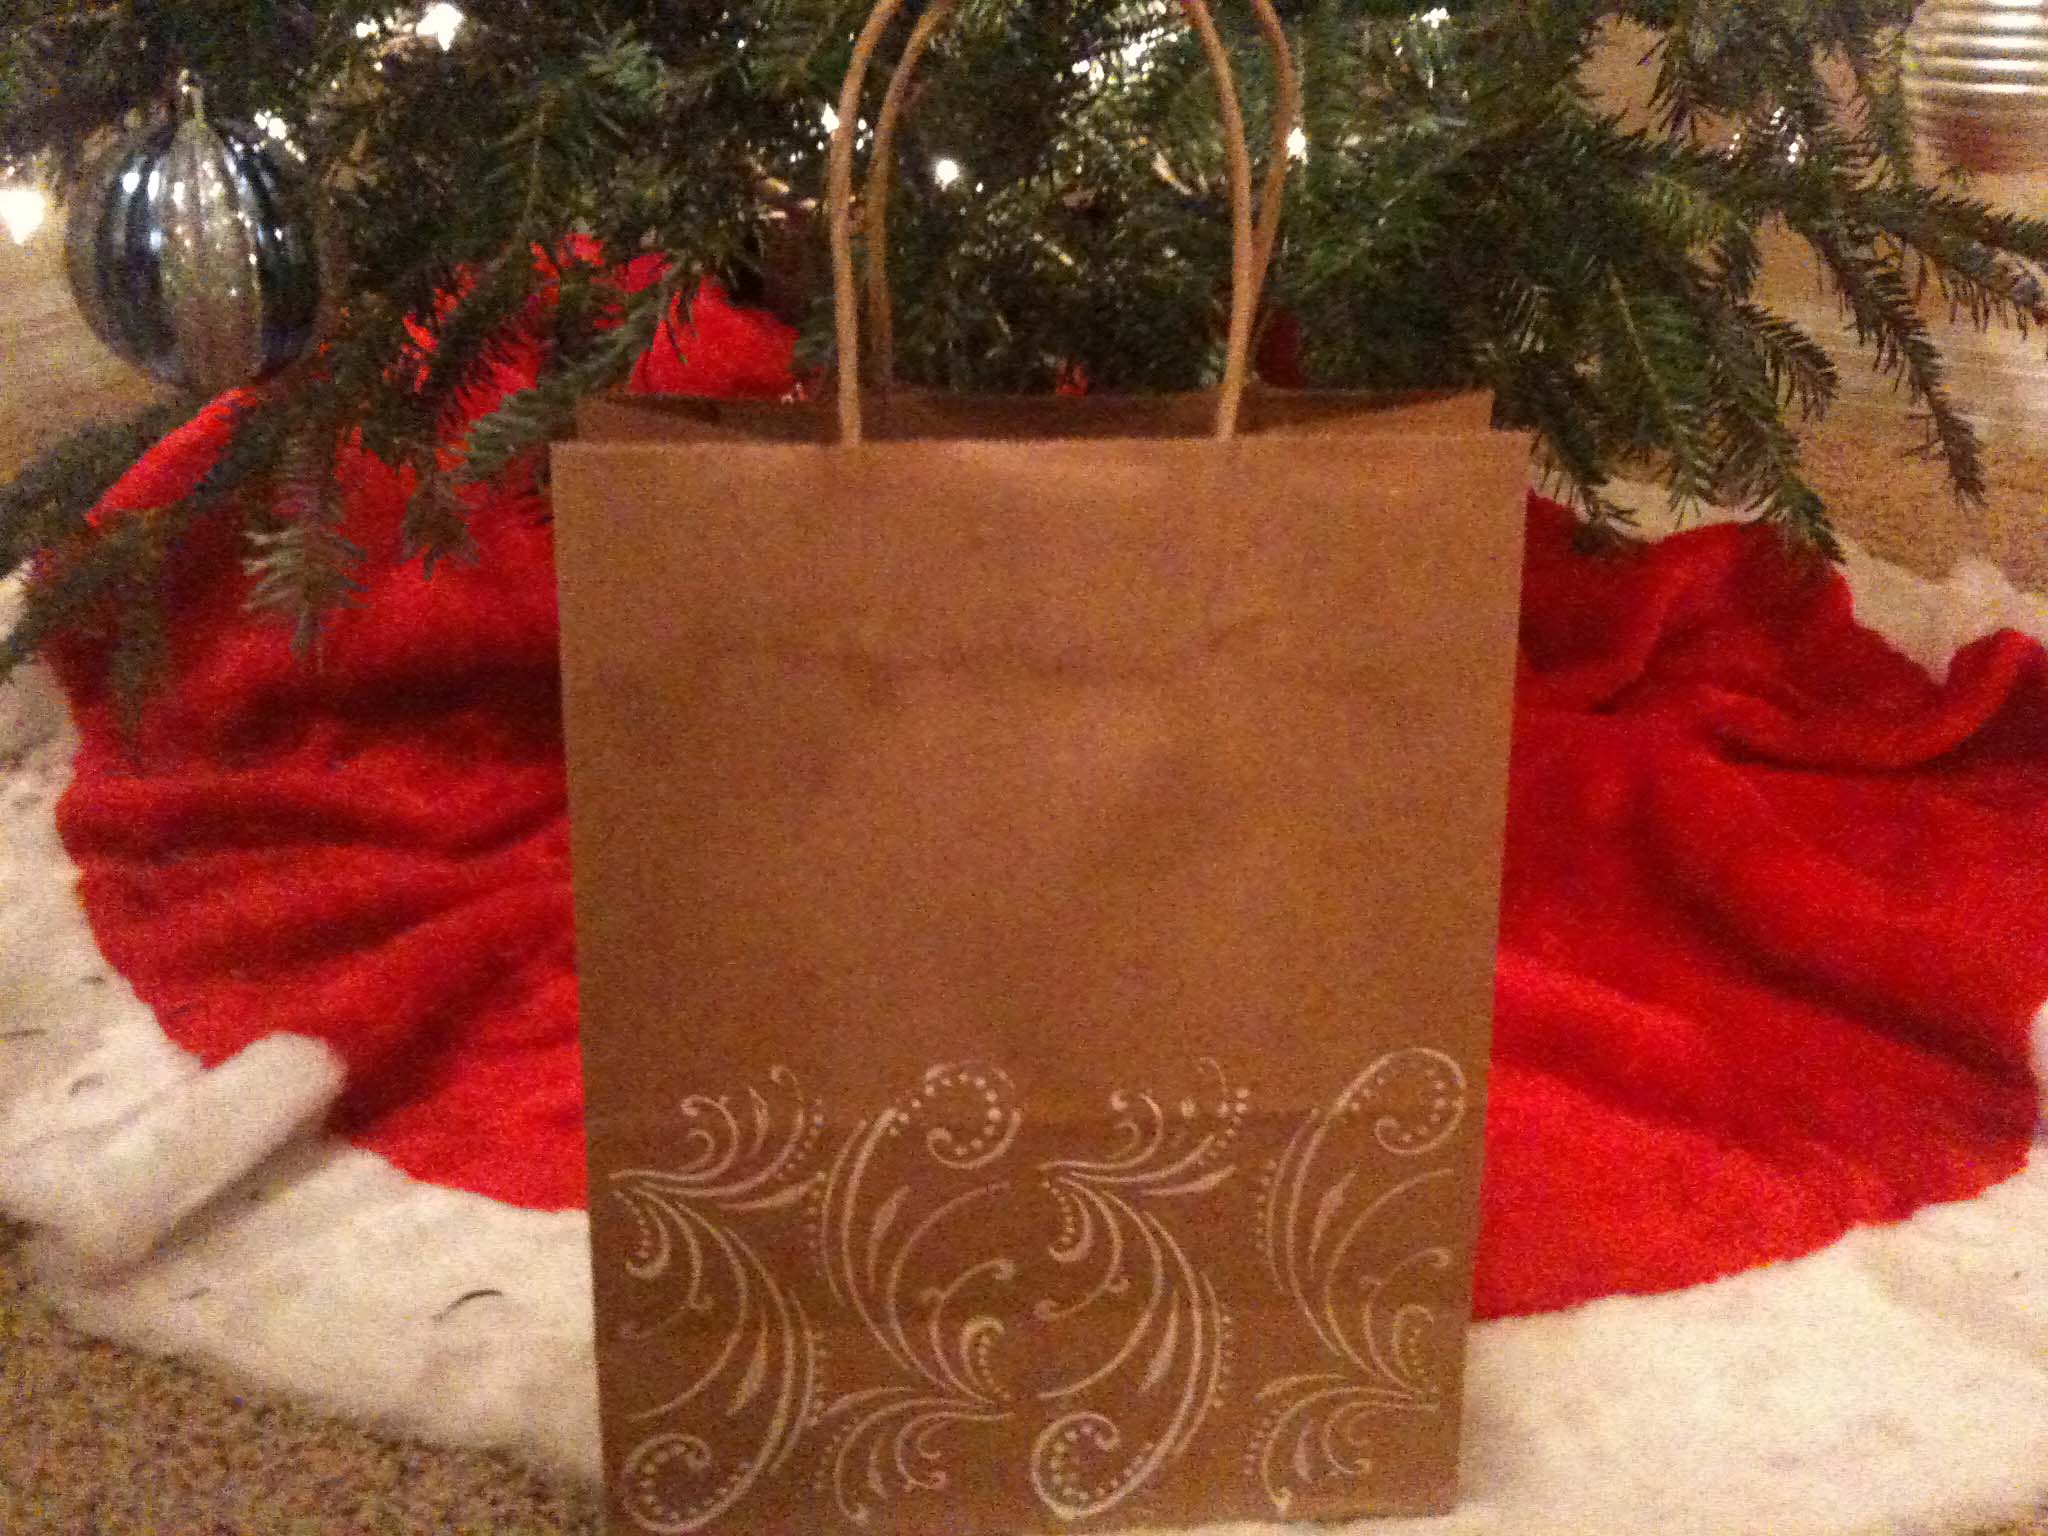
I’ve been super crafty recently, and since there are only 4-5 days until Christmas (depending on how you count), I thought I would share the DIY gift bags that I made! They’re fairly simple, and I think they look like something that you would buy in a store for a pretty penny…or two (or three or four hundred).


Note: Please forgive me for the bad quality iPhone photos. My 5 year old camera would not be any better than these.


Pretty and Simple DIY Gift Bags via TheELD.com


Stamped Design


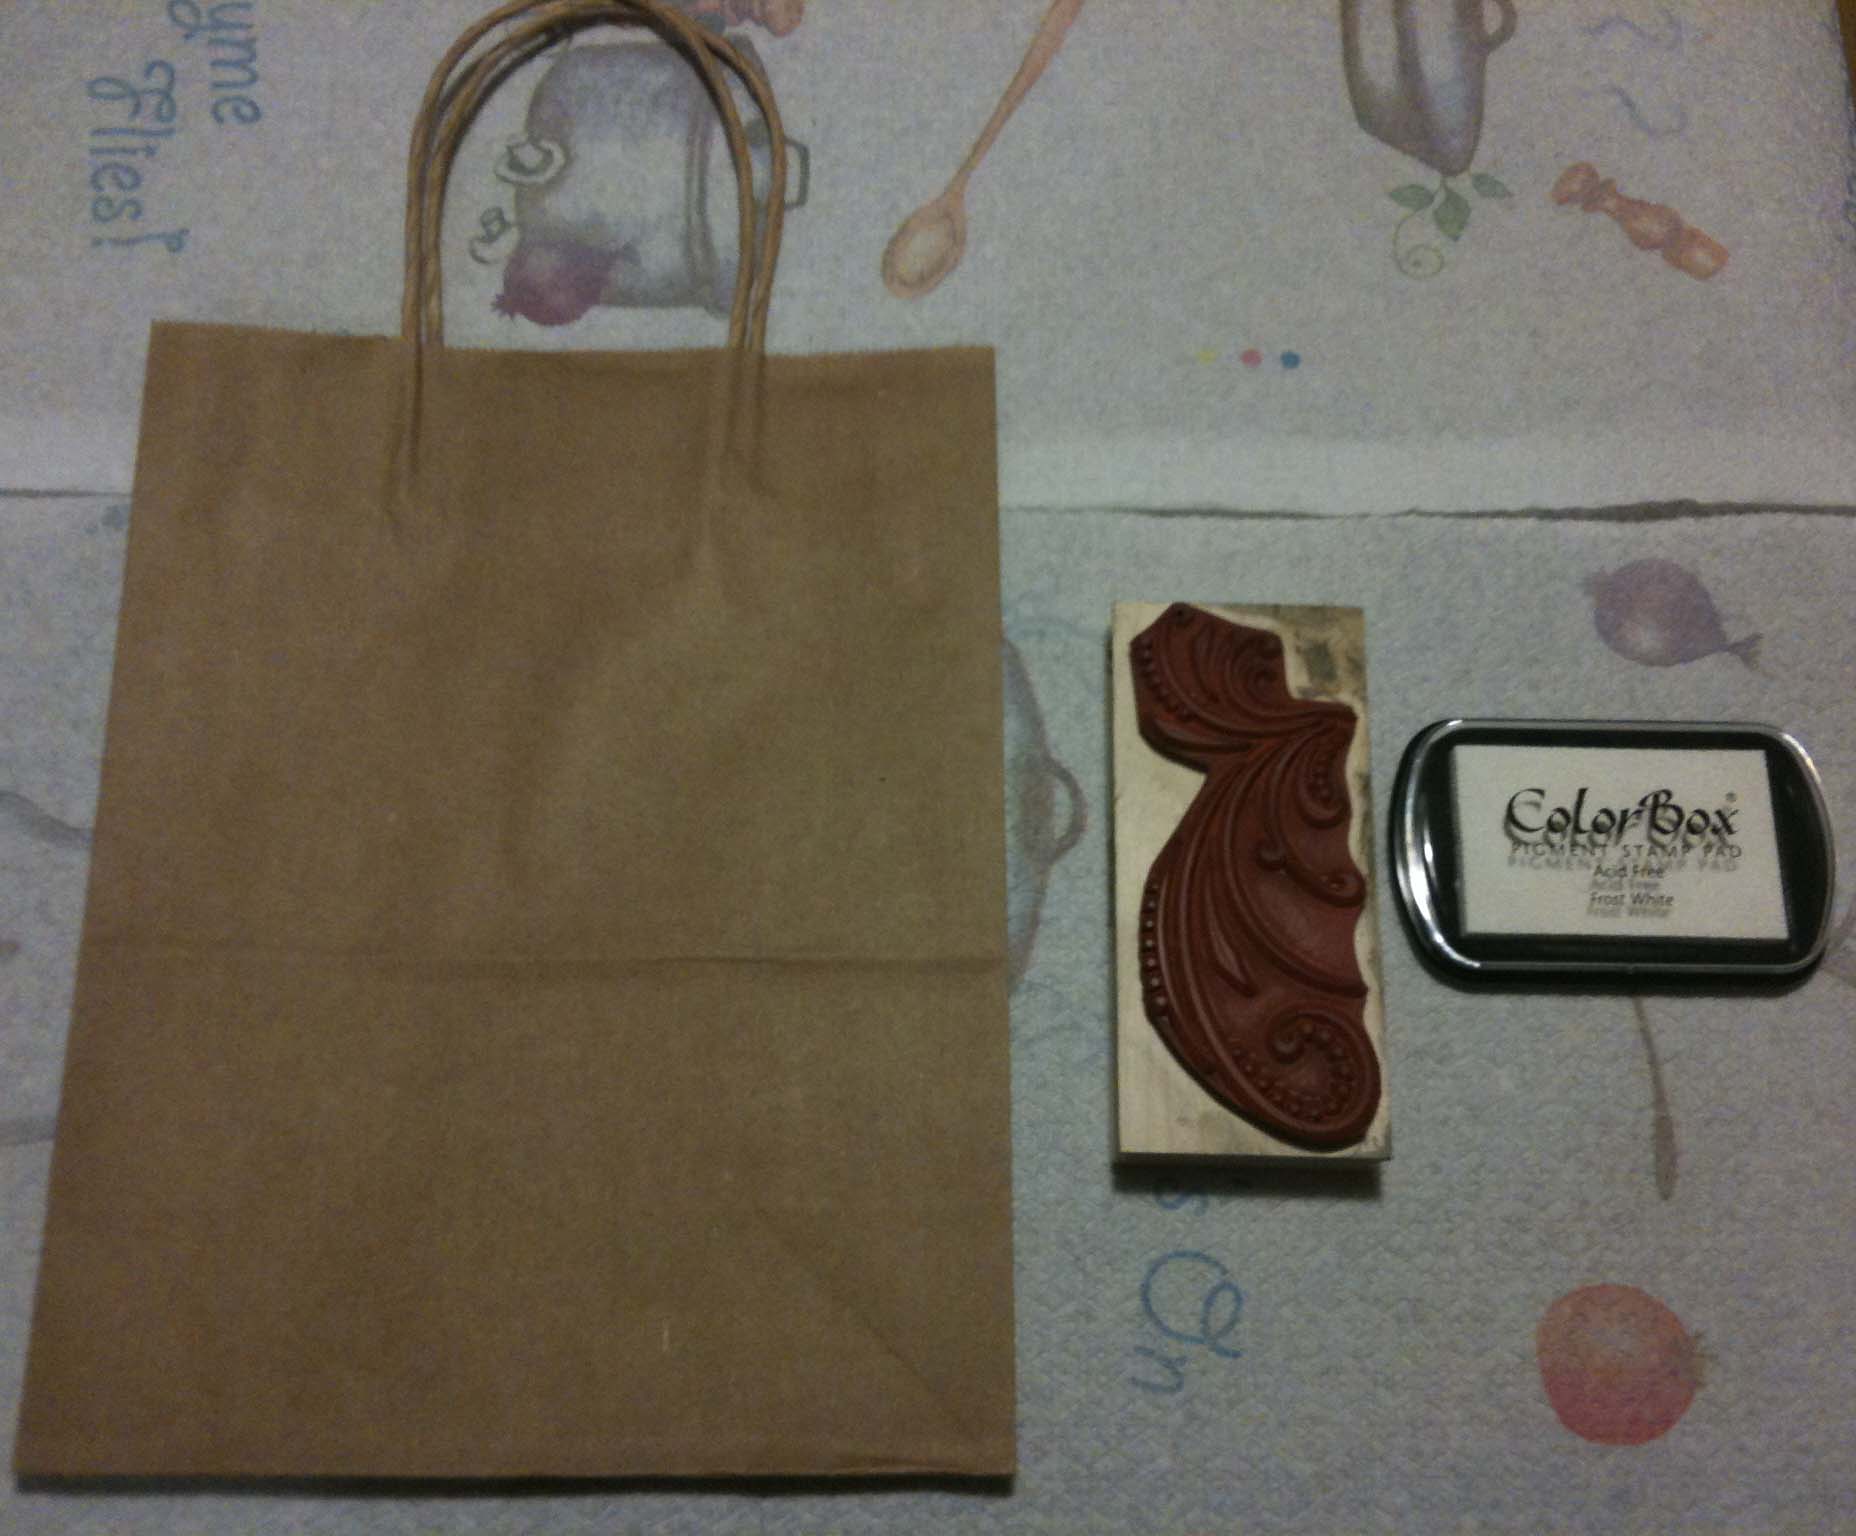
Materials Needed:

  • – Gift bag (Kraft paper works best to absorb the ink)
  • – Your choice of stamp design(s)
  • – Your choice of ink color


Step 1: Decide how you will be positioning the stamp. In this case, I used one stamp, and just alternated the direction that I stamped in.
 

Pretty and Simple DIY Gift Bags via TheELD.com


Step 2: Ink your stamp, making sure there is enough, but not so much that it will bleed. You can test the stamp on a piece of paper or paper towel if you would like.
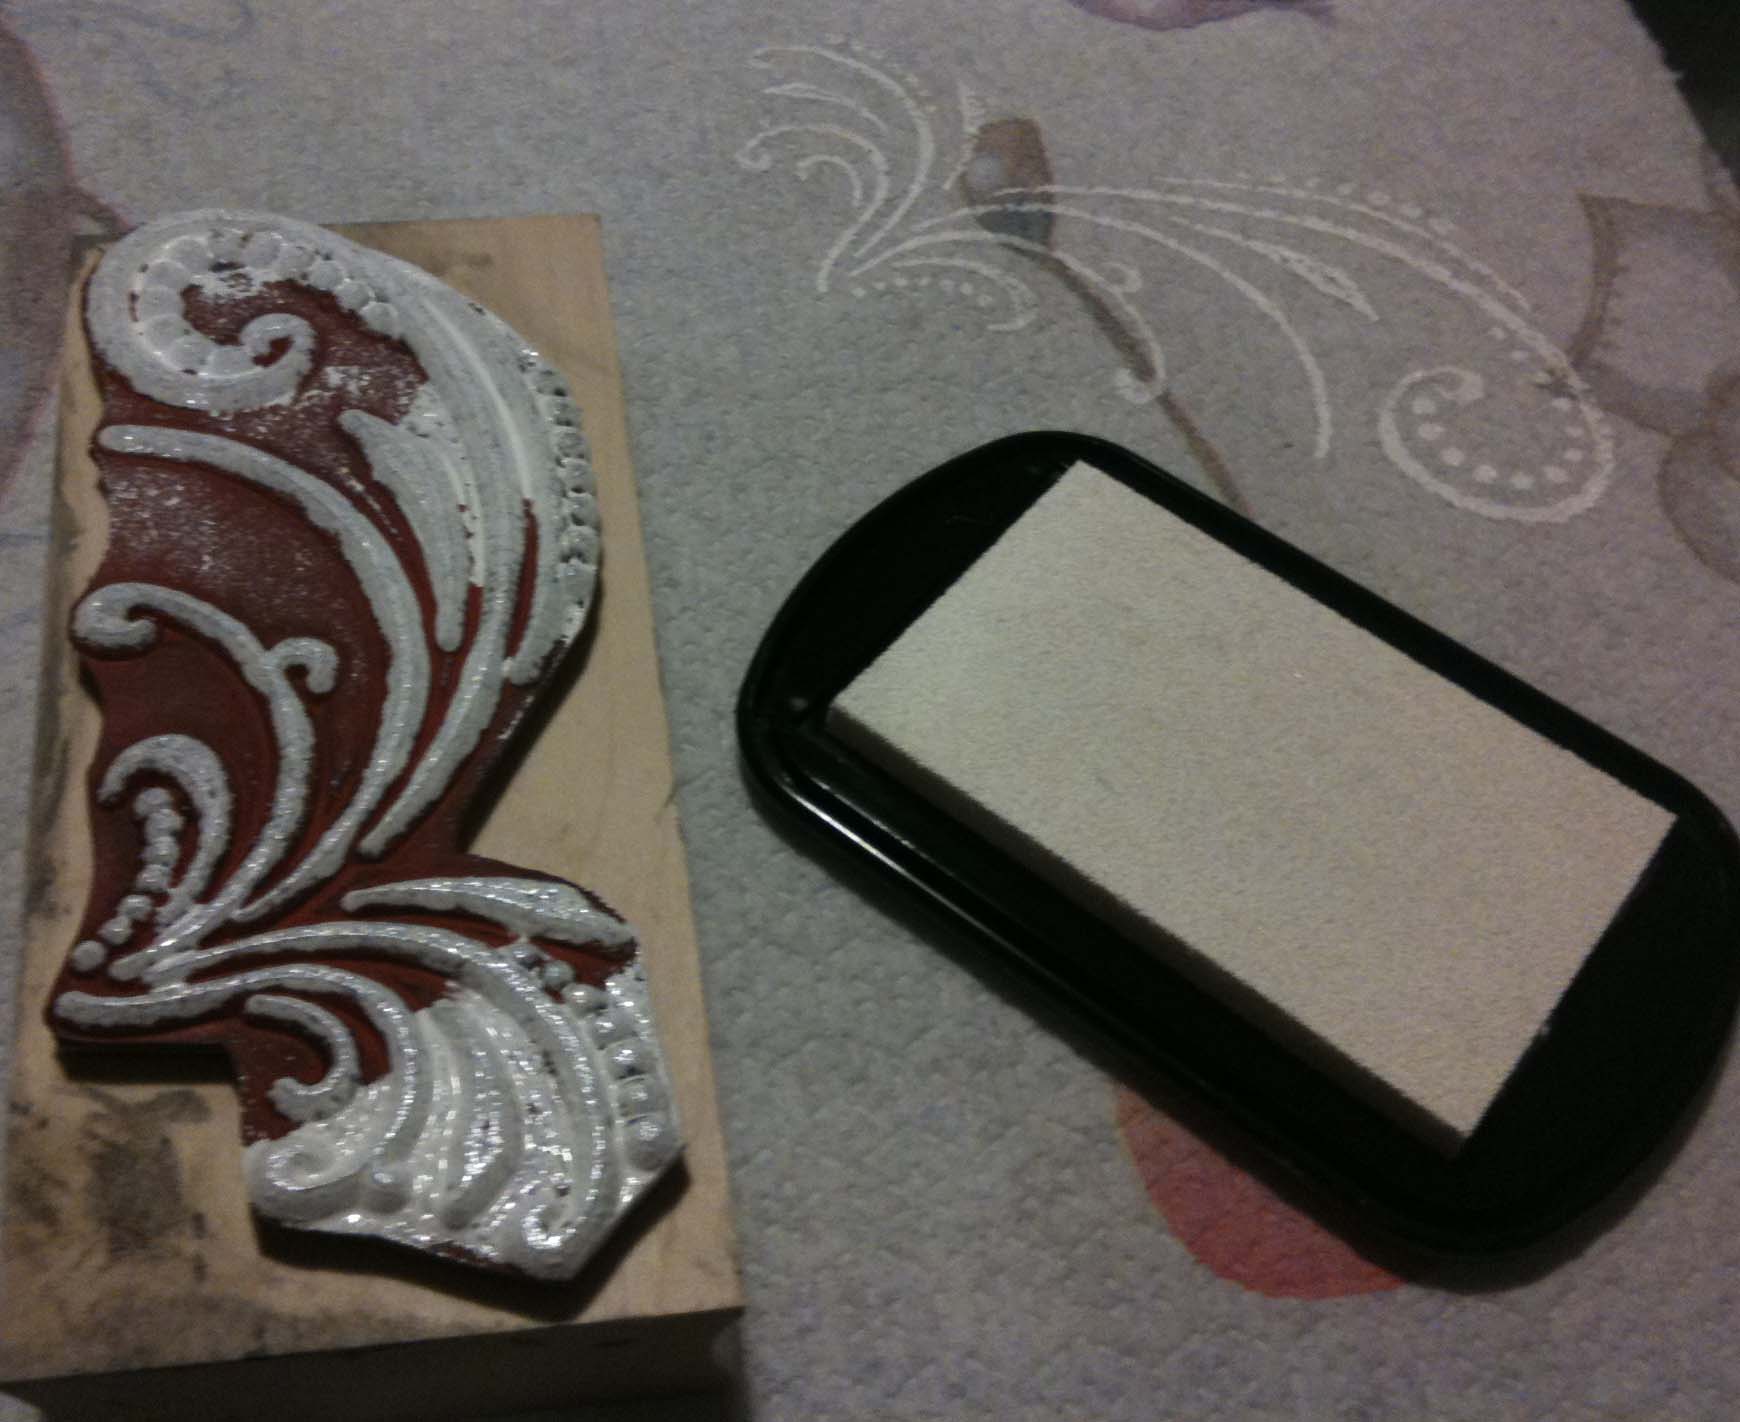
 

Pretty and Simple DIY Gift Bags via TheELD.com


Step 3: Use the corner of the bag to help you line up the stamp. Press the stamp down firmly and lift. Repeat in your choice of direction and pattern!
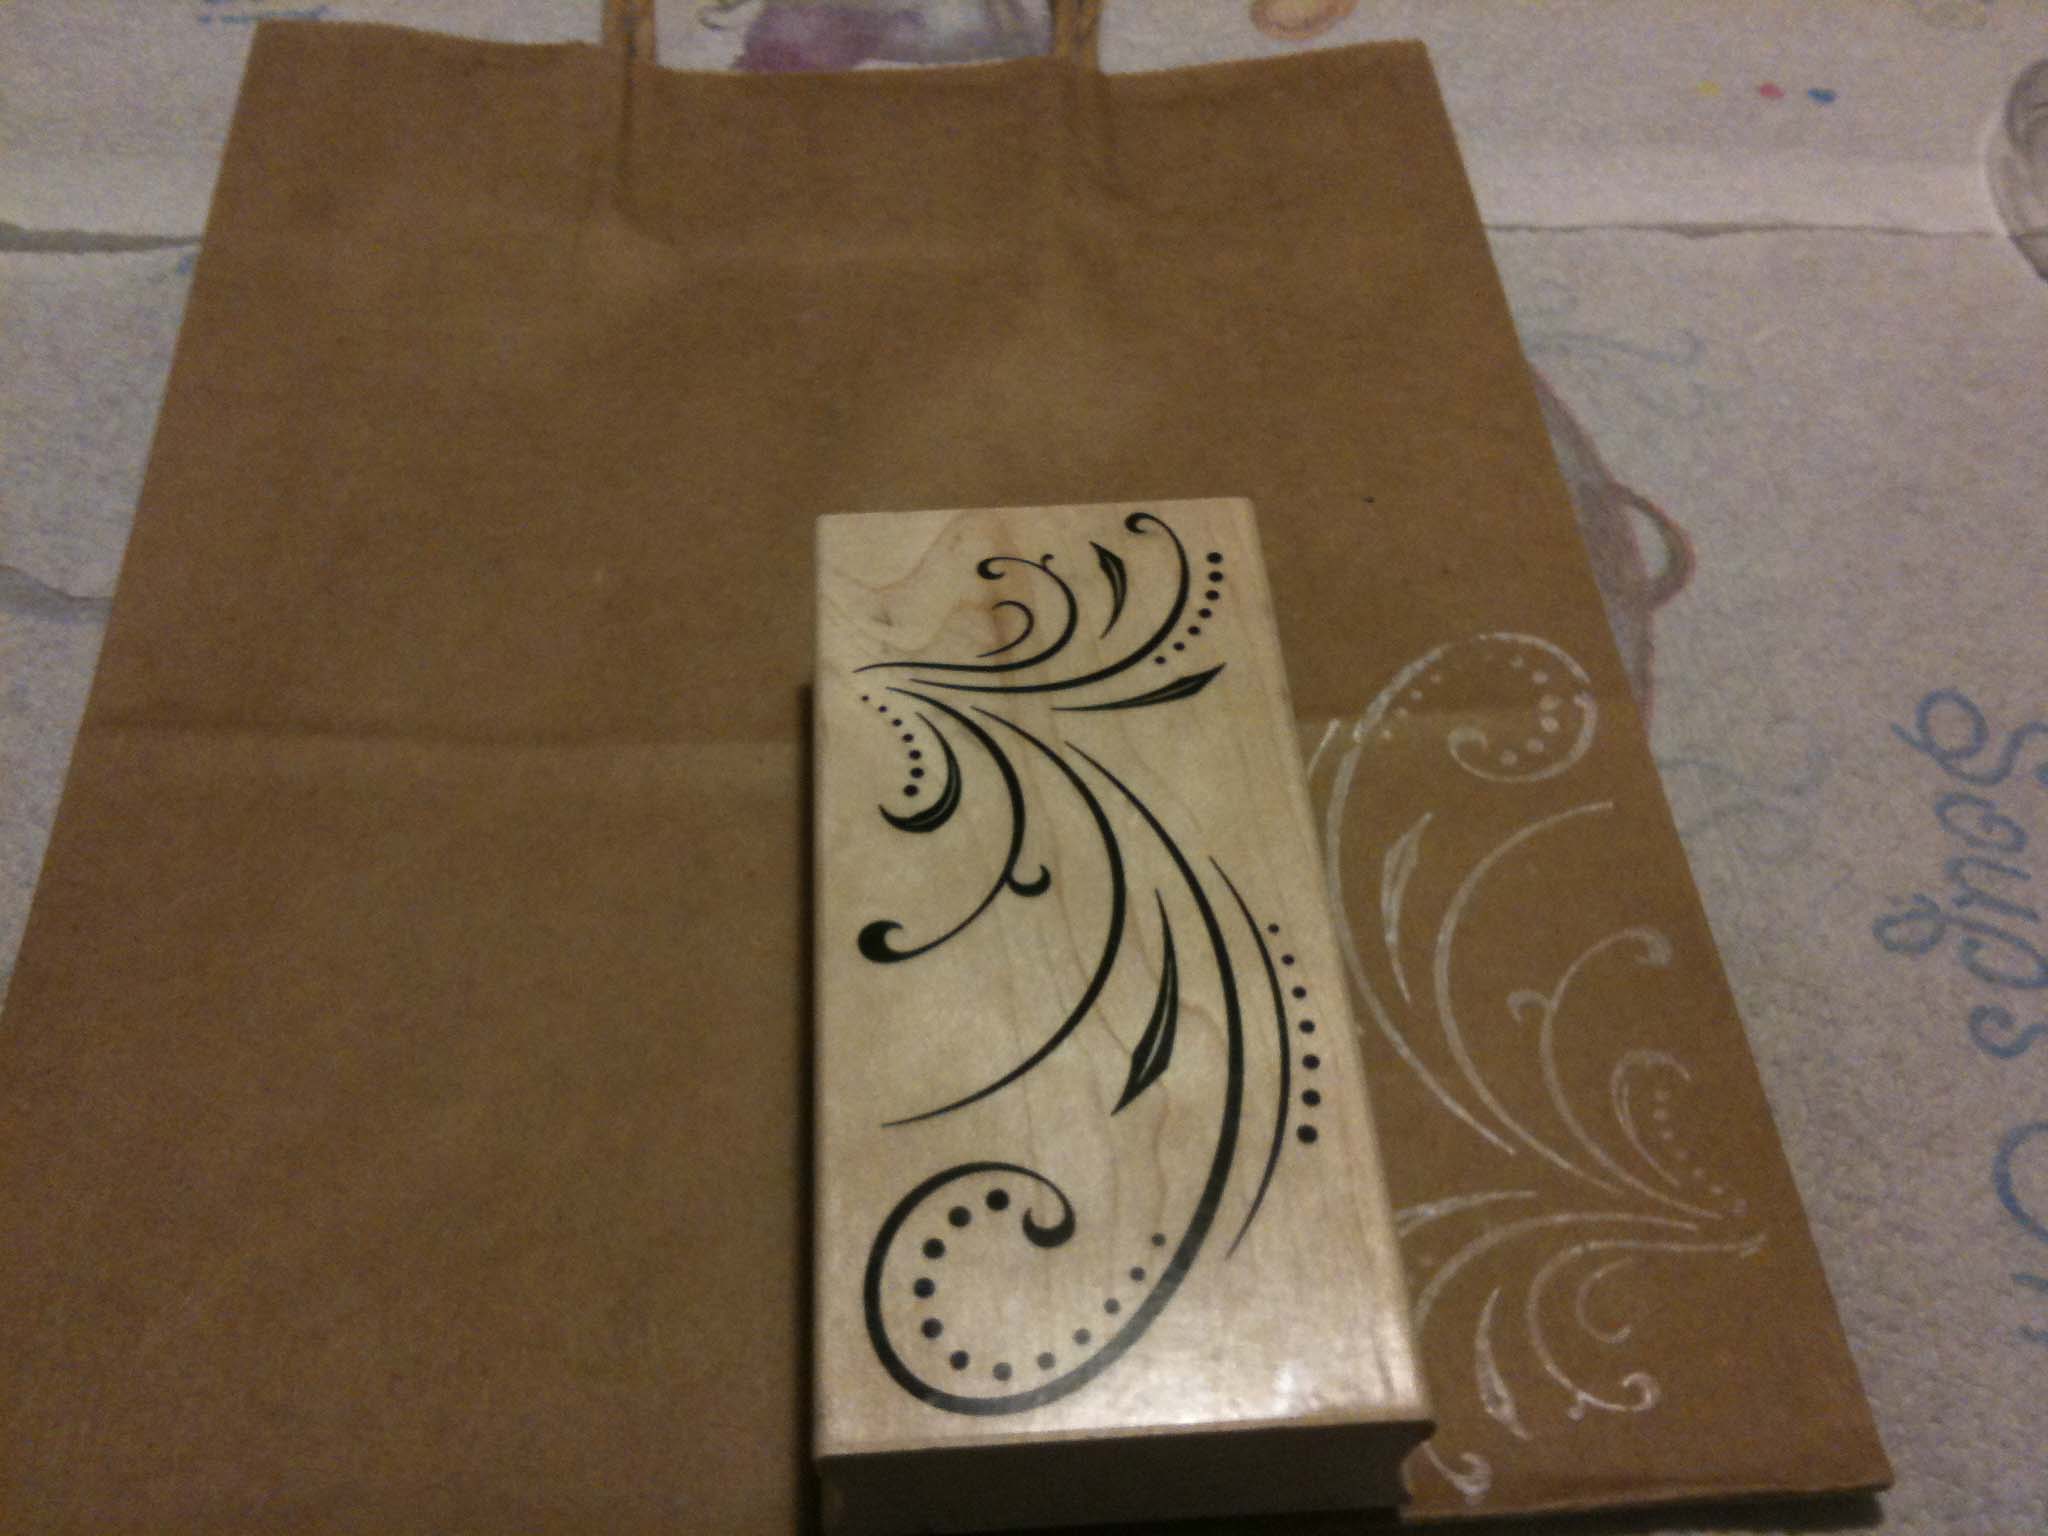
 

Pretty and Simple DIY Gift Bags via TheELD.com


Step 4: Let the first side dry (5-10 minutes) and repeat steps 2 and 3 on the opposite side!
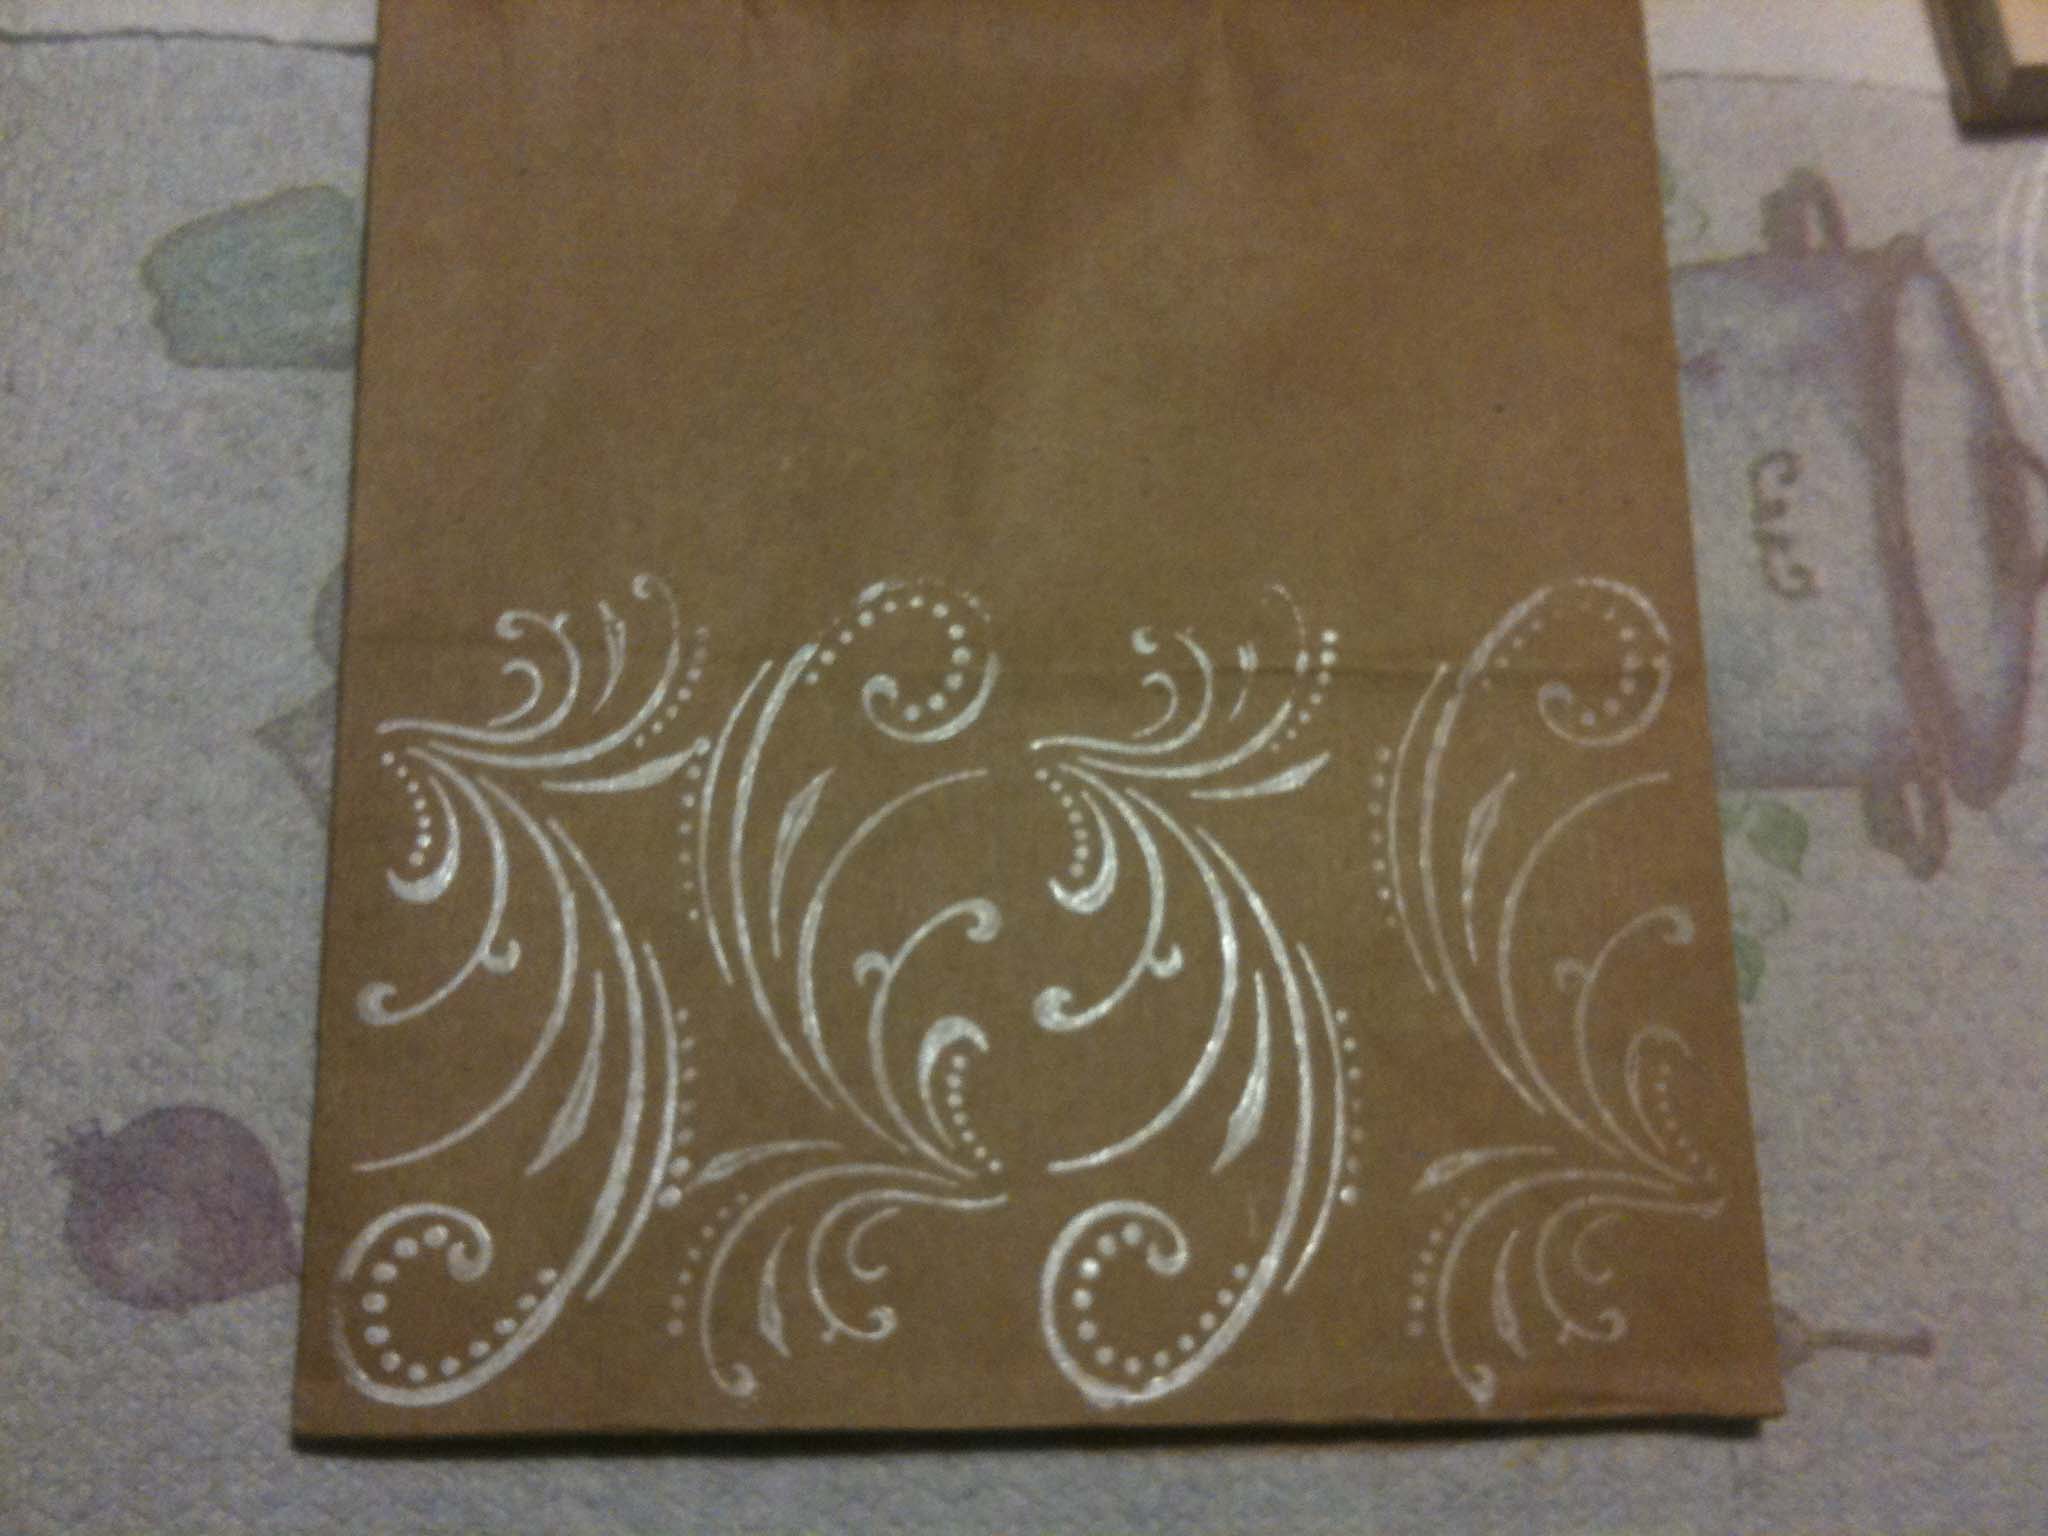
 

Pretty and Simple DIY Gift Bags via TheELD.com


Voila!


Pretty and Simple DIY Gift Bags via TheELD.com


Stencil Design


Materials:

  • – Gift bag (again, Kraft paper is preferred)
  • – Your choice of paint color
  • – Your choice of stencil(s)
  • – Stencil brush


I’m a HUGE fan of damask (in case you couldn’t tell by the background of the blog), so I chose a damask stencil for this bag. This bag involves a bit more time and positioning than the stamp design bag. Using some sort of stencil brush or a spongy brush works best so the paint doesn’t bleed under the stencil. You are not able to use spray adhesive because the paper will tear.


Step 1: Decide what the positioning of your stencil(s) will be. If you have to, trace some of the stencil on the bag to give you a better idea of where each portion will end up.


Pretty and Simple DIY Gift Bags via TheELD.com


Step 2: Blot the paint on your brush prior to stenciling. Hold the stencil down in position as best as you can. You can use tape on the sides if you wish. Be sure not to put the tape directly on the bag. In a blotting motion, fill in the stencil with paint. You can also use a brushing motion, whichever your prefer. I found that both methods work just fine.


Pretty and Simple DIY Gift Bags via TheELD.com


Step 3: Carefully lift the stencil and place in the next corner. Repeat step 2.


Pretty and Simple DIY Gift Bags via TheELD.com


Step 4: Move to the next corners of the bag.


Pretty and Simple DIY Gift Bags via TheELD.com


Step 5: Wait about 5-10 minutes for the corners to dry. Stencil the center, the sides, and the corners of the bag.


Pretty and Simple DIY Gift Bags via TheELD.com


Step 6: Wait for the first side to dry completely before attempting the other side. (I think there’s enough prettiness on the first side, so I didn’t do the opposite side.)


Pretty and Simple DIY Gift Bags via TheELD.com


They’re not perfection, but adding that special DIY touch to a gift will make the recipient feel so special! Definitely perfect to put your wedding party gifts in too! I gave my sister-in-law one of the stamped bags, and she had no idea I made it!


by: Lauren

I LOVE the prints and bright colors the bride is wearing in this engagement shoot by Liga Photography! It looks like the couple is having so much fun, and that’s exactly how an engagement shoot should be! They must have been so comforatable with Abby!


Colorful Engagement Shoot by Liga Photography via TheELD.com


Colorful Engagement Shoot by Liga Photography via TheELD.com


Colorful Engagement Shoot by Liga Photography via TheELD.com


Colorful Engagement Shoot by Liga Photography via TheELD.com


Colorful Engagement Shoot by Liga Photography via TheELD.com


Colorful Engagement Shoot by Liga Photography via TheELD.com


Colorful Engagement Shoot by Liga Photography via TheELD.com


Colorful Engagement Shoot by Liga Photography via TheELD.com


Colorful Engagement Shoot by Liga Photography via TheELD.com


Colorful Engagement Shoot by Liga Photography via TheELD.com


Colorful Engagement Shoot by Liga Photography via TheELD.com


I wish I had worn stylish clothes like this for my engagement shoot! I was told that I needed to stay away from prints and bright colors, but if someone tells you that, they obviously haven’t seen photos like these!  The best engagement photos are the ones that aren’t boring and bland…wear whatever your heart desires. Prints, bright colors, colorful heels…just be yourself, that’s all that matters! Thank you to Liga Photography for demonstrating that you don’t have to wear boring clothes to have amazing photos!


by: Lauren

I first started writing this blog to help other brides find inspiration and ideas. A few months later, I ended up diving head first into the wedding industry. I have gained so much more knowledge and experience than I ever thought I would have had six months ago. Now I still blog to help brides find inspiration and ideas, but I also aim to provide insight into the wedding planning experience.


I was thinking of some of the things that I was faced with in planning my own wedding, as well as things that I have seen or heard about while working weddings. These are things that as a bride, you may not think about right away when planning your wedding, or even might possibly forget about on the day of. Just some tidbits for you to consider!


  1. Setup: So you’ve done a great job planning your wedding, and everything is ready to go for your wedding day. However, what is your plan for setting up your wedding? If you can set everything up the night before, that’s great! But what if there’s another event at your venue the night before your wedding? When are you going to have time in between getting your hair and make-up done to arrange those awesome DIY centerpieces that you made? Or put 100 chair covers and sashes on 100 chairs? Or arrange your escort cards in that really cool way you planned on? Chances are, you, your mom, nor other family members are going to want to be breaking a sweat setting up for your wedding a few hours before you walk down the aisle. Most venues will often help with the setup, but they aren’t going to know your vision for how you want everything to look. Having an event design company or wedding coordinator do these things for you is your best bet.
  2.  

    Tidbits You May Not Think Of When Planning Your Wedding via TheELD.com

    Photos by Audrey Snow


  3. Transportation Logistics: This is something that brides often don’t consider until a week or two before their wedding, myself included. It sounds simple, but stop and think about it for a moment. If your ceremony is located somewhere other than your reception site, everyone is going to need to get there. If you have a limo, it picks up you and your bridesmaids, but what about the groomsmen? There are a ton of different situations for handling transportation, and they are all unique to each wedding depending on location, time, and people. All in all, the best option is to have a limo take the groomsmen to the ceremony first, and then pick up you and yours bridesmaids. But then you may have members of the bridal party asking you how they will be getting home if they’re traveling in a limo, causing you unnecessary stress. These are all things that need to be decided prior to your wedding day. Don’t forget!
  4.  

  5. Photo Time: Ah the infamous time for photographs. There can never be too much time allotted for photographs. Guests hate it, photographers love it, and brides and grooms are clueless about it. The traditional way of taking photos following the ceremony usually results in posed family photos, people getting annoyed, and few quick shots of the bridal party and you and your new husband. A cocktail hour is a good way to keep your guests entertained while giving you some time to take great photographs. However, if photos are important to you, then consider taking photos before the ceremony. I know, it’s not traditional, and you want your fiancé to be surprised when he sees you walking down the aisle. I felt the same way, and I regret not taking my photos before the ceremony. You would be surprised at how many photos I have seen of brides and grooms that took photos before the ceremony, and how excited, happy, and surprised the grooms still looked watching their brides walk towards them. If anything, I think you both are more emotional and excited because you can actually take it all in, instead of walking up and starting your vows right away. Taking pictures prior to the ceremony definitely results in better pictures, and more time to enjoy each other on your wedding day! Trust me, you will not regret taking your photos before the ceremony. And your photographer will love you for it.
  6.  

    Tidbits You May Not Think Of When Planning Your Wedding via TheELD.com

    Photo by Amy @ Angela Anderson Photography


  7. Backup Weather Plan: When choosing your wedding date and the type of wedding you are having, hopefully you figured the weather into the equation. If you’re getting married in Florida anytime between May and November, you can put money on it that it will rain. Do you have a backup weather plan? If your ceremony is being held outside, do you have an alternate location? If the reception is outside, do you have tents? Another time to have a weather backup plan is for your photo time. Have an indoor location picked out just in case it rains or if it’s unbearably hot or cold outside. You don’t want to have a ton time for photographs and then end up getting none because of the weather. (Read: This tidbit brought to you by my own wedding day mistake.)
  8.  

  9. Vendor Love: Hopefully you chose your vendors and know what they will be doing for you on your wedding day. Your vendors are all doing you a service. It’s just as if you were getting your hair done, or being served at a restaurant, just more focused on you and your wedding! If you can, please give your vendors tips for their services. It’s not required, but it is in good taste. Also keep in mind that the vendors that are at your wedding will be on a similar schedule to you. Therefore, as humans, their dinnertime is most likely the same time as yours. Provide meals for your vendors. It can be the same thing you are serving your guests, or something else, like a sandwich or pasta. They will greatly appreciate it, and it will keep them going at full capacity for your whole wedding!


These are certainly not all of the things that tend to be looked over when planning a wedding, but they’re the first that came to mind for me. Essentially I could do a separate post on every single one of these, along with real life stories for each. But I’ll spare you all the gory details- for now. If you have a wedding planner, expect for these things to be touched upon prior to your wedding. However, if you do not have a planner, as a lot of brides don’t, these are some great things for you to remember! I want everyone to have the best wedding possible, and part of having the best wedding is avoiding any possible pitfalls your might encounter on your wedding day!


Do you have another tidbit to include that you’ve encountered? Feel free to leave a comment and share it with everyone!


by: Lauren

Last week I posted about the new Eco-Beautiful Weddings Blog, which is absolutely amazing. Well now there is something even BETTER than the blog! The Eco-Beautiful Weddings Magazine! Eco-Beautiful is the FIRST ever eco-friendly wedding magazine. Pretty cool, huh? The e-zine was launched early yesterday morning, and it’s awesome! Words cannot even describe it…you just have to see it for yourself!


Eco Beautiful Weddings Magazine via TheELD.com


If you’ve never “read” a magazine online, it’s a great experience, and an even better way to save paper- and money! You just flip through the pages, you can zoom in, and you can even click on links…I bet you can’t do that with a paper magazine! I definitely wanted to share this great publication with everyone. I don’t want anyone missing out on inspiration or ideas! So grab a cup of coffee, glass of wine, or whatever tickles your fancy and sit down to soak up some Eco-Beautiful Weddings!